July 24, 2026
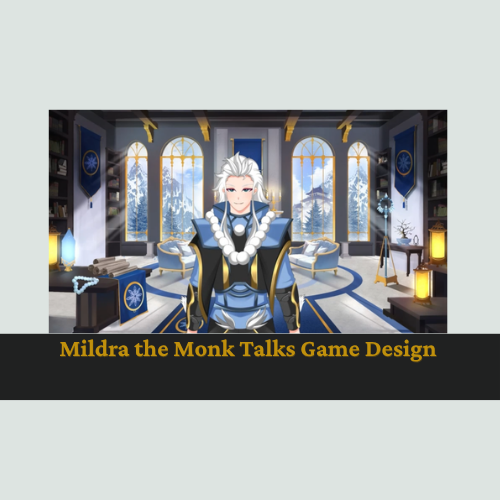
Transcribed content from our recent YouTube video: https://www.youtube.com/watch?v=6RnO-Se1ols Transcription [00:00:00] Hey everyone, welcome back to Eternity TTRPG. It's been a little bit since I've been on with you as, uh... But today we have back Mildred the Monk, who is a friend of the channel. Uh, we had a great conversation last time. I have reviewed Final Fantasy Legends Edition, and you guys really liked it. Those are some of our most viewed videos, and we just wanted to bring you back on today. Thanks for coming on. Excited to talk. Thank you for having me. I enjoy being had So we're gonna be talking a- about a couple different things today, but let's start with, I think, the thing that the most number of people will be interested in who follow your work, at least as of recently as well, but jobs and classes for Final Fantasy Legend Edition. Do you wanna give people, like, a quick intro for those who don't know about this edition? So Legend Edition I started about [00:01:00] five years ago as originally it was an idea that kind of up, that kind of showed up in my head and wouldn't leave. Um, that idea of, um, taking Legend System, which was a three, a D&D 3.5 hack, um, that was part of the Test of Spite Arena Challenge on Giant in the Playground years and years ago, taking its track system that I thought was very interesting and applying the job system to, that's in Final Fantasy to it. That was the, that was a two-part stream that I did, that I did five years ago. had to be two parts because midway through, um, Mother Nature intervened we said, "All right, we'll do part two when, when, when things clear up tomorrow." Oh gosh. And when we-- And after that, the idea wouldn't leave my head, and I started working on it and working on it, [00:02:00] uh, until Legend Edition formed, which very much is its own beast. Um, there's been a few people who've looked at the fact that I use six ability scores and a D20 as a, as a core mechanic and say, "Oh, this is a D&D derivative." Um, it isn't... It's only that if you look at the barest surface, but looking at the surface is also very, um, shallow. I mean, by... I mean, if you're gonna g- if you're gonna go that low, then, um S- than say the Black Hack is a, is no different than playing D&D even though one's a, one's an aim high, one's an aim low. a better example is, and I've brought this up in the past, that'd be like saying Fading Suns is no different from D&D because they both use a D20. Even though Fading Suns is what I, is what I like to call D20 blackjack because it's about aiming high but also [00:03:00] aiming low Like you're trying I think un- you're trying to get under a threshold, but you're trying to get as close to it as you can Gotcha. Sure. I mean, yeah. I mean, people call tissue paper Kleenex, right? Like, that's just kind of, it's like the shorthand so that people know what there's talking about. But when you dive into it, every TTRPG is different, and Mm-hmm. this is the best version of Final Fantasy TTRPGs that's out there. So for players who wanna play Final Fantasy, yeah that was to estab- that was to establish a, that was to address a pet peeve that I had. And I, Oh? this the last time we talked about, but I have covered multiple Final Fantasy TTRPG projects, it Mmhmm games in all but name like Fabula Ult- like Fabula or Aegis, or direct fan projects like The Returners series of projects and the things that spun from them. And a pet [00:04:00] peeve that I had was a lot of them entirely on the SNES era. Now, don't get it wrong, like four, five, and six. A little bit mixed on Mystic Quest, but that's another story. But I know there's whole generations for whom they have more of an attachment to the PS1 era or the PS2 era. There's a whole generation for who- for whom 13 was their entry point. They speak on that as fondly as you or I might speak on six. There's gonna be a whole generation for whom 14, 15, and 16 have been their entry points. And those people, "Just house rule it," didn't sit with me. So I wanted Legend Edition to be a agnostic affair that draws upon the recurring mythos of Final Fantasy. Um, the exact kind of thing that MJ Gallagher has written several books about. [00:05:00] if you don't know, MJ Gallagher has written books on the mythological ties to multiple Final Fantasy entries. done two on seven, one on 16, and he's currently writing one for Tactics. Oh, nice uh, one on Tactics is going into, is going into things that I think even a lot of Tactics fans have overlooked. Things like ear- things like early Gnosticism, the c- the, um, idea of medieval demonology, and a lo- and a lot of, um, a lot of mythos about Be- about the story of Beowulf and story of the Knights Templar Mm-hmm. As well as the church relationships between Eng- between England and France and, of course, the Hundred Years' War. Taktics is a great game. There's a lot packed into it There's a lot packed into it. A lot Yeah especially the more [00:06:00] Shakespearean parts, is directly Matsuno's doing. And I've had a bit of a theory that the Cid in that one, Cidolfus Orlando, meant to be a nod to, um, um, El Cid, AKA El Campeador, the pr- the Prince of Valencia, who is kind of a national hero in Spain Okay. Yeah, I'm not familiar Mm-hmm. Oh. He was somebody who f- who fought on the side both Christians and Muslims during hi- during his time. Oh. Interesting especially in Valencia, kinda has this, kinda has the same heroic figure status that you'd see of a l- a lot of other medieval legends Mm-hmm. Uh, know if that's actually the case, but when I look at the position of that character, um, I can see the parallels[00:07:00] Sure But I wa- but the idea was I wanted something that was just as viable if someone was doing the high f- the, um, fantasy approach like in, um, like in the ori- like in the original or in three, the steam- the steampunk approach like in six, uh, or the futuristic approach like in eight or 13. Sure There's gonna be some house ruling, but minimal house ruling. Um, I've always held the belief that house ruling should be a spice and not the main dish Yeah, I mean, it's nice for people to be able to play the games the way they want to play. I think that's one of the main pillars of TTRPG is giving people the ability to customize, but also enough here that they can take something and work with it as is. [00:08:00] Uh, 'cause I, I don't wanna customize everything. That's why you're buying the game, right? So should we dive in maybe for some examples? Like, you- there's... What, what was it? Is it 56 classes? Jobs, I should say? around com- combining these, combining the ones from the, um, core book and the Ultima expansion, Yeah about jobs and four classes. Four pluses, right? Okay I do have to... Now, a lot of times job and class are interchangeable. In Yeah, I like the way you did this. Go ahead. Yeah things, and this is somewhat of a nod to the, to the delineation of jobs from the old Returners project that started in the mid-'90s. But it comes, it comes down to there are only four classes, and your class is basically a chassis. This is [00:09:00] what determines how well you develop HP and MP, what stats you're gonna be using for physical and magical combat, and how many skills that you have trained. Um, there are four of them. There are four classes as mentioned. Each of them corresponds to one of the original four crystals. Um, corresponds to the earth crystal, which is basically the per- basically everything physical combat is under that. Um, expert is kind of the skill monkey and corresponds with the wind crystal. Mage is self-explanatory and corresponds with the fire crystal, and adept, which is often the in-betweener, corresponds with the water crystal. There are also there are also a dozen or so jobs that are independent. These are jobs that are not associated with any of the four classes because when you're building a character, you're picking three [00:10:00] tracks. one that has fast progression, one that has medium progression, one that has slow progression. Any of the jobs are available. The only rule is at least one of them has to be associated with your class, and each, um, each class has about 11 or so jobs that are associated with it It doesn't have to be the first pick, it just has to be one of them. Oh. For ex- for example, um, the jobs associated with warrior are berserker, dervish, dragoon, fencer, fighter, knight, monk, samurai, sentinel, sniper, and weapon master. Oh. So if you take warrior, you gotta have one of them And this also means that you can't build a character out of nothing but independent jobs Hmm. I see Oh. Independent jobs are, I guess that, I guess I put them in the same category [00:11:00] as, like, prestige classes because they do re- they do re- not in the sense of you need to a bunch of stuff in order to qualify for them like you did with prestige classes back in the day. knows I'm not doing that. I did, I didn't like how some of those prereqs worked. more that th- they, the kit that they have demands a slightly higher system mastery, like a slightly hi- a slightly higher understanding of the way the mechanics work. And within the book, I have a disclaimer say basically saying, "You can pick th- you can pick these as your first character if you want to, but we do not recommend it." I see. Sure Of course, if you do do it and then you complain that it's too hard, don't come crying to me about it because you were given fair warning I love how when we were playing, [00:12:00] um, there are so many options. Mm-hmm. I think the replayability factor is gigantic with this game, 'cause even I hadn't thought about it too until you just mentioned it, but like I could be a warrior and then have the same three classes, but then I could play a different, um... Or, I'm sorry, the same three jobs, right? So I, I could have like a warrior class and then three jobs, change my class to something else with those same three jobs, and my play experience could be s- substantially different just based on my hit points, mana difference, skill difference. Not even to mention... um, weapons Yeah, and, and limit break. So the way that you play even the same three combination of jobs could be completely different. And I mean, not to mention the fact that you already mentioned there are 60, six- like a big, 6- 60 of them, right? So [00:13:00] I mean, it, it's, it was cra- it was... One of the hardest things was choosing what I actually wanted to play. Yeah also love that because it's like if you don't like it, just, you know, next time you create a character just build something different. Like I consider this the better form of analysis paralysis. Like a lot of Yeah, sure is in a game, it's more of wanting to pick a dis- to make a pick that's going to screw you over two or three sessions down, Mm-hmm. uh, or having to pre-plan your idea multiple levels in advance, which just creates false choice, which is also not ideal. Yep it's there are so... Instead, there are so many really good options that you could do that Right. is a good problem to have. That's a great problem to have a lot of the jobs are gonna be very familiar to people who have seen the job system as it's been presented over the years. Mm-hmm.[00:14:00] there are a few that aren't n- there are a few that are from adjacent games like Bravely Default, and there were a few that aren't in any of the video games, but I wanted to fill certain niches or certain motifs that I felt didn't quite fit any of the existing jobs Yeah Oh. And some of them are, the name is there where, where that name has been in past games, but the way it's executed is different to give it its own identity. Oh An example that comes to mind is the Arcanist. Um, I think one of the, one of the, of, one of the cases where Arcanist showed up is in Final Fantasy IV: The After Years. But ultimately it was just a black mage with a couple extra tricks, I Sure. Mm-hmm Then I looked [00:15:00] at the, um, Japanese version of the Arcanist job and it, and the translation for that is basically witch. Um, and I thought, "You know what? Let's build one around curses." So we Yeah, that's cool Um, and since you mentioned limit break, I will touch on that. Yeah conscious choice to not have limit break be some sort of uber attack Yeah I know that those w- I know that those kind of things are a staple Final Fantasy ever since VI. Um, VI technically first introduced it, VII obviously popularized it with a limit break gauge instead of it being a hidden mechanic. But at the end of the day, those are just jumped up versions of attacks, and for a tabletop system where you don't have the flashy effect to give a, Yeah signpost, that's not all that interesting[00:16:00] Not really. Yeah Especially since if I were to do it as a gauge, I would have to calculate out how the rate of gain for that gauge for any potential kind of attack. And to reference Batman Forever, it just raises too many questions Yeah, that's a dark hole of game design for sure. Mm-hmm. It's easy to miss something. You're dealing with a lot of interchanging pieces here with all the different jobs you can combine. I see the problem. Yeah So instead, I took inspiration from the game breaker rule that Fantasy Craft has. Fantasy Craft is one of the games I've listed as inspiration. It's one of... It is my favorite take on the 3.5, um, of the D20 system. I put it even above Pathfinder, that's how much I like Fantasy Craft in terms of sheer volume of flexibility. [00:17:00] But At a certain level, in- classes in Fantasy Craft have what is in turn, what is called by a lot of the homebrew community a game breaker, something that the class can already do just at a hi- just at a higher level. Sure Um, you sort of have something like this in video game form with the two-hour ability that was in Final Fantasy XI, which was this, um, improved version of what that job could already do. You just couldn't, you just could only do it once every two hours. Not once every two hours, it would've had a two-hour cool down. And the approach with this is you can activate a limit break when you're below half health. It lasts until the rest of the encounter, and is essentially an improved version of what that class already does. Uh And the catch is you have four limit breaks, three from your jobs and one from your class[00:18:00] Yeah Each of the... And when you activate one of them, you are locked off for the rest of the encounter from the other four, or from the other three, I should say So to use warriors as example, their limit break is action surge, which lets you make a weapon attack without using your action. You just can only do it once per round. Could you do this to do two attacks in the same round? Yes. You could also do other combinations if you want to as well Oh. You're just getting one weapon attack for free for the rest of the encounter, but some of the other stuff from your, from your job combinations you won't be able to do Uh, and I do wanna, I do want to touch on a moment for, um, the design philosophy we had when it came to feats Because one of the things that I tried my absolute best to avoid when introducing feats was feats that were just number go up[00:19:00] Sure The... There are a couple that are like that, but not in the same, but not exactly. A lot of times it was built on feats are little tricks that you can do to fur- to further personalize the character, and said tricks don't necessarily fit into any one existing Mm-hmm. And I f- I always felt that was the intent with feats when it was introduced in third edition D&D, of little tricks to personalize. somewhere along the l- line, the memo got lost or was put into forms I don't think it was designed for. You know, the whole feat chain problem or the feat tax problem as has been discussed plenty of spaces elsewhere. Um Yeah And to, and to that end, I don't really have a extensive amount of [00:20:00] prerequisites when it comes to feats. of times it's ju- it's just on three feat chains. Usually those ones have some kind of Roman numeral attachment I think a lot of what we're kind of talking about too, back to sort of the d- overall design of things, is that for almost every game out there, there's like ... I don't know if it's just the advent of the internet or now that, you know, all of us who grew up playing games are now adults and we kind of get games more, but there ends up being like the meta builds, right? And so you talk about like D&D and Mm-hmm. there's like this huge problem of like you can't play a rogue anymore in D&D 5.5E 'cause it's just terrible compared to the damage output of so many other classes. Oh, And a lot of people- on rangers. Yeah. Right. Right. And then a lot of people play as if combat or damage per turn or whatever is like the key factor, and if you aren't pumping out damage, then you aren't having [00:21:00] fun, right? But I, I think it's interesting that you've taken this approach with feats where it's like it's about things that you can do for your character. It's about the, the role play and the character building more than just the optimization. But I also think that just the sheer s- way that you've made this game makes it really hard to create any kind of like meta build. Like, maybe if, you know, a hundred thousand people were playing this game every week, there would start to be some patterns emerge, but it seems to me as if you've gone to really great lengths to give every class its own personality, Mm-hmm. I think that y- people would have a very hard time finding anything that's gonna be like super busted basically. It's more about having the fun playing the character you wanna play instead of optimizing every little thing. Yeah. Now, there's a, there's a couple things I can say on that. One,[00:22:00] Sure I will be flat out honest, whether it be in tabletop games, in video games, in war games, in board games, in card games, any kind of game period, loathe meta Me too. Because Me too I am, and I s- I have done my fair share of t- of tournaments, whether it be in, um, card, whether it be in card games. I w- I, I'm not great at it , but I did dabble in tournament scenes in, um, fighting games growing up. Cool I certainly don't do it as, as much these days, but I... But something I did. the reason I hate meta so much is I'm, I grew, I grew up ar- I grew up around a lot of, a lot of freestyle artistry. You know, whether it be Hmm import, the, um, the whole import tuner craze of the early [00:23:00] 2000s, the go- or listening to, listening to early hip hop in the golden age of sampling, j- or just remix culture with, um, music. Or j- or just the idea of freestyling when it came to building, um, stuff with Lego as a little kid. That's awesome. Yeah that idea of expression of building the style that, that fits y- that fits you, not necessarily is the best numbers. And Yeah what really helped hammer this home for me was when I was spending a bit of time revisiting, um, various shooters. And especially re- especially, um, getting an understanding for what the intent of the perk system in, say, early Call of Duty was Mm-hmm Because if you look at the perk list in say Modern Warfare or Mo- or Modern Warfare [00:24:00] 2 or Black Ops or whatnot, it's not about raw numbers. It is about, it is about picking ones that best fit a certain play style that you're trying to go for. Yeah Uh, like for example, somebody who picks scavenger probably gonna be using a light machine gun, because scavenger lets you get more ammo on ammo pickups so that, so you have more bull- you have more bullet per bullet. And if you're using an LMG, you're gonna be eating through that ammo pretty fast Oh. It's not really, it's not really about the numbers per se. And I've s- a similar thing to an extent with some of the unlocks in games like Team Fortress 2, where not picking them for numbers or percentages, you're picking them for a certain style. Uh, like a common build when I would play Pyro in was [00:25:00] having things like the flare gun and the Axtinguisher. The flare gun is a secondary, lets you set people on fire at range. It's just on an arc so it is a little bit tricky to use. And the Axtinguisher auto- always does critical hits if you're hitting somebody while they're on fire. So you can see how they feed into each other. And there were certain combinations that we saw where we thought this could be a particular annoyance or this could be a particular pest in combat, but it was funny so we kept it. one of the early examples of that that we've brought up and that we've brought up plenty of times over the years is somebody doing Arcanist and Fencer. Because Arcanist is all about incubating a curse within themself and then transferring that curse as a debuff to the next person who hits them. Fencer is all about taunting an enemy to force th- to force them in a duel where both sides get bonuses to hitting each other and penalties to [00:26:00] hitting anybody else There's good synergies for sure Mm-hmm. when it comes to the... There's been no end of arguments about game balance. seen, I've seen it talked Sure f- back and forth. I've seen people talk about balancing issues with this game back and forth. A Yeah me to, a lot of the balance arguments puts me to sleep for the same reason the, um, math breakdowns of classes back when I would follow the brilliant GameZologist forums put me to sleep. Even if I did rip off the whole Godzilla thing as a this is what I don't want. But The, but the, To bo- to dial myself back a bit, um We take an, we take a policy called Brawl Minus when it comes to game balance. The attitude being if everyone's potentially broken on all sides of the fence, no one is. So for a bit of context, Brawl [00:27:00] Minus was a response mod, some say a meme mod, to a mod for Smash Brothers Brawl called Brawl Plus. The intent with Brawl Plus was to nerf a lot of the overpowered elements in Brawl. Um, Meta Knight, I'm looking right at you. know what you did. Brawl Minus took the opposite approach of instead of nerfing the overpowered stuff, just make everybody ridiculously overpowered That sounds like a lot of fun Like, like a fully charged warlock punch from Ganondorf in Bro- in Brawl Minus could be a one-hit, um, knockout. And as ridiculous as that is, still the signposting and still the tells that can be punished if someone knows what they're doing. So as, as overpowered as everything is, there is still an internal logic of if you got hit by something like that, you were ignoring the very obvious tells and that, and [00:28:00] you're getting punished for that. Mm-hmm. you know, in the s- in the same way that I remember when I would, when I would play a lot of Halo 2, and a lot of people hated the glitch, um, BXR. And I had defended it because I, because at the time I had said the timing window for it is very specific, and if you don't get it right, you are going to get punished you just left yourself wide open and you can't hit back Yeah. Things that are strong come with a downside or they're projected so it's defendable against it Mm-hmm. And there is the concept in game design called signposting, where this is where you have those very obvious tells about what you should stay away from or what you should be wary about 'cause something's gonna come. Uh, and when you have the, when you have th- when you have that particular signpost and then you [00:29:00] ignore it, then it becomes your own fault, and you gotta deal with the consequences of that. Uh, think of any video game RPG where you've seen where the, where the game is telling you the enemy's preparing for a large attack, then you don't shore up your defenses and you get wiped Oh, it's the, it's the same principle. And I never want... I, be- I remember being so annoyed when I would see certain game developers take combinations that the community had discovered on their own that were, that added to the fun factor of creatively overcoming obstacles and take that away from them. Uh Yeah, it's kind of a lame approach for sure It's not only a lame approach, but I feel like it sends the wrong message. To me, it sends the message of don't bother getting better at the game because we're just gonna take away your tools. Yeah. Don't be creative yeah, [00:30:00] a big example of this would be Mercy hopping exploit that was found early on in Overwatch, where people figured out that with the right timing using Mercy's movement mechanics, they could clear a lot of ground very quickly. About less than a week after that was discovered, it got patched out Sure. Yeah, I, I, uh, it's a tough thing as a game designer too, because I do also feel you have a vision Mm-hmm. how you want the game to be played, and there are just some things where you didn't imagine it being used in a certain way, and it wasn't intended. And if it does become the situation where it's like, now that we know this exists, Mm-hmm. who does wanna play for the optimal meta build now must do this. Yeah That can take away from the fun as well, but I, I think it depends on, like, your priorities as a game designer. Like, is it is it around the fun? Is it around the [00:31:00] creativity? Is it around your original vision? And y- I often find you have to balance all of those things actually, so th- there have been some times where I've taken away toys from other people as well. Um, but yeah Legend Edition, because it's built around being, being a sandbox, having whatever my specific vision is, is not as important. The only time that I've really modified something so that it ta- so to take away certain tools that I f- I felt were, um, stepping over the line is if, is if I felt it was undermining other things. Um, the, the, um, benchmark that I use for this sort of thing is I don't want a knock spell. Um, I was never a big fan of spells like knock or teleport Hmm or oth- other games. I wasn't a fan of knock because I f- because I [00:32:00] felt it completely undermined the presence of having a rogue in the party. Like, Yeah, sure. why have Right all the time rolling to pick a, to pick a lock when you, when the wizard can cast knock and the lock is no longer a problem? Have the wizard be a rogue, yeah And I didn't like spells like teleport 'cause that, 'cause I felt that r- that took away from the narrative control of the Sure GM. Um, especially if you can tel- especially if you can just teleport right to where the dungeon is instead of having to Sure. thing of fi- of trying to find out where it is. Yeah and in the same vein, I also wanted to avoid things like CODZilla. Uh, CODZilla is something that came out of the tier sys- the tier system of effectiveness that the Brilliant Gamesologist forums, um, devised, where somebody re- the COD is short for cleric or druid, and it was a reflection Okay that somebody who [00:33:00] knows what they're doing with either of those classes is an entire party by themself. Yeah and to that end, when it came to designing the jobs, something that I tried to avoid was the idea of a single job being multi-role. Um, Yeah. I was impressed by that really quick as well. You know, when I was reading through the first time, and I mean, every time I go into it, Mm-hmm. it is very crystal clear what each class does. Mm-hmm. it, it, it's so focused that if it was only one... You could only play one class at a time, it may feel a little narrow, but I actually love that because you're mixing. Mm-hmm. think you, you really lasered in on what each job does and what they're about Yeah. Like for, for example, um, I had, I had gotten a bit of pushback over the fact that with the paladin, unlike s- [00:34:00] unlike plenty of the games, I did not give the paladin access to white magic. Um, part of that was had to answer the question, well, what do, what do you do if you have a paladin and white mage as part of your job trio? now Sure. things that would overlap. You're both... Yeah two, I felt pal- I felt the identity of paladin more centered around covering allies and taking the hits for them rather than white magic. Plus, I've never been a fan of, um, of half casters Interesting. Yeah. 'Cause they end up doing both things poorly in most games. Yes. Yeah. Oh Yeah, they're like half people basically. Yeah, the, the big pr- the big problem with, the big problem with it is doing that s- doing that sort of multi-role is gonna run into conflict when y- when class systems in general are about [00:35:00] specialization. Having a generalist in a b- in a game built around specializations has an inherent contradiction. feel like this is Sure why in D&D, um, the ranger has been cursed since the days of AD&D. Yeah, th- there's no identity there. I mean, I, there's no identity, and I, I think that's probably another big thing, right? Like, they, they don't know what they want ranger to be. You're just like a ranged fighter, but then you're not. But the things that you can do, anybody can do. It's not really that interesting. Yeah, I had... The funny thing is the one edition that I'm supposed to hate but I don't because the check bounced actually solved that issue Um, the fourth edition ranger, I don't have that problem with Oh yeah, I actually like fourth edition. Mm-hmm. It's kind of a bum that nobody else did I, I've, I've been a fan of fourth edition since it started out in 2008, and I have routinely taken the piss out of people [00:36:00] who go with that MMO argument, and I basically tell them, have no idea how MMOs actually work if that's your, um, main ar- if that's your main argument." Um, and Especially s-since, um When it comes to, when it comes to the po- when it comes to the power setup, I'd be remiss if I didn't point out that, that so many of us had reference index cards And nowadays you can get whole spell decks for casters Sure But I r- but the Ranger in fourth was one of the premier, one of the premier examples of the striker. real problem that it had was one infamous daily power that got, um, errated out that led to the meme of Kenshiro Orcaslayer, because if you hit, you could keep hitting until you missed. Oh. Um It's like [00:37:00] Thunderfury weapon or whatever it's called in WoW. Mm-hmm. The first- Yeah Yeah, and Orcus was one of the big high-level monsters in the, in Wind theory. Manual. Got it somebody who had the l- had the luck of the dice gods on their side could ju- Yep. keep Just one shot it. Yeah. he runs out. So Yep the And becau- because of that I w- I wanted... Now, with a lot of games, they can have multi-role effects with their classes because you're only picking that one class for the most part. Here, the multi-roleness comes from the combination of your class and jobs, also Yeah the fact that there's plenty of characters throughout Final Fantasy that don't quite fit one particular job exclusively Also because jobs changed between iterations. So, I mean, your solution makes a world of sense Yeah, like the, the knight in the original [00:38:00] Final Yeah. Right ultimately a proto-paladin. Right. Yeah. When you mentioned cover, that was the first thing I thought of Yeah, I th- I think the, when people think of the paladin in the classic sense, the first version they're gonna think of is Cecil in IV. Um, and in that s- in, in that same vein, there were s- there were some casting lists that were easy to design for. The hardest one was Blue Magic because, um, Blue Magic goes literally all over the place in every iteration, and when I That's like the point of it, yeah. Yeah a specific thing was important Right Ah. And I will, I will note that, um, with the ones that I took liberties with, those ones still that rule of I need to answer what exa- what exactly its [00:39:00] big, for lack of a better term, gimmick is. Um, now some got r- some were under other names but got renamed because of things I wanted to avoid. Dynamo was Gunner originally, um, meant to be a bit of a nod to the g- to the Gunner dressphere in X-2. Um, Mm-hmm. that and I said I wanted a John Woo-like, um, job. But of the fact that the job system is divorced from required weapons, which was something I wanted to do from the word go, um, I felt that calling it Gunner or calling the sniper, it was originally Archer, would Hmm Yeah from that So I went with names that were a little bit broader in that sense. and the other reason One of the things I'm obviously the most proud of is the weapon system and the fact that it is divorced from your choice [00:40:00] of job. So you could play a bl- you could have Black Mage as part of your combo and use a long sword, um, and still make it work because in addition to that whole not m- not fitting thing, there's If I were to do a standard weapon list that you see in a lot of fantasy games, there are so many weapons within Final Fantasy that don't fit that Yeah. Yeah, there's so many, yeah. Um, whether it the pinwheel for Noah, yeah yeah, the weird pinwheel thing that Rinoa has, Yeah um the, over- the oversized, um, shurikens that Yuffie has, the fact that hair accessories are the weapon of choice for Red XIII. Um, the Plus the, plus, um, I'd, I would, I'd think of certain unorthodox weapons that I would always pick in [00:41:00] other fantasy games. like I was I think I was m- I think once I was, um, like I was playing a character in an Eberron campaign that involved the desert elves, which are an interesting beast in and of themselves. I said, "You know what? It would fit that, it would fit that my character uses a khopesh instead of a long sword." Um- And isn't anything in the rule set for a khopesh, obviously, so we had to make that up Yeah And I've also mentioned that no matter what, there's gonna be some that has some weapon that ha- that has the same cool factor as when people first saw the Buster Sword back in 1997. Mmhmm instead of telling them, "Just house rule it," which is like pushing them off the deep end and saying, "Swim, damn it." Uh, I w- I wanted to, I wanted to provide a framework where people could make those unorthodox weapons[00:42:00] That's awesome instead, instead of just being Sisyphus having to constantly make new and bigger weapon lists. Uh, and again, for example, I, I know that the... There's the, um, common motif of the monk uses unarmed weapons, except when it doesn't. But I remember in the past pitching, "Okay, instead of, instead of using unarm- instead of using just bare hands, um, why, why not use a... why not use something like, say, a rope dart or a, um, sansetsukon?" Uh, a sansetsukon is a three-section staff Hmm. Okay. Yeah And obviously a rope dart is, well, exactly what you think it is. And I have, I have plenty of players who are firearm enthusiasts, much like me, and I know that they would come up with some unorthodox suggestions, [00:43:00] and I'm like, "Go, go right ahead with it." Um, I know one It's awesome who, who was playing this giant character, he said, "I wanna lug, I wanna lug around a m- a slightly miniaturized version of a punt gun." I'm like, "I'll let you do it, but, but you're... But, um, you can only fire it every other round because it's a punt gun. Those things weren't meant to be carried." Like, for context, a punt gun was a type of ridiculously oversized shotgun for m- for commercial duck hunting that was supposed to be mounted on a small boat, a punt They eventually Yeah, players won't do that good at their job Players will do that. They'll try to do the things that they shouldn't be doing. And, We-- I was gonna say we, we have a little bit of time left. I don't mean to cut you off on that thought, but, uh, once you finish that thought, I would love to go through some more of the classes and like just the, the most broken or [00:44:00] insane or fun stuff that people have come up with so far Um, I will note that from a design perspective, I like giving players powerful but unsafe equipment. benchmark for that kind of thing is if you remember the Noisy Cricket from Men in Black, that, Oh yeah, that was... I love that. Yeah. Oh. You know, That's awesome a hell of a lot of damage, but every time you fire the thing, you get sent flying Mm-hmm. Yeah. Why not? oh, this As far as cl- as far as some of the individual class, some of the individual classes and jobs, as far as some of the ideas, um, I remember being really proud of the way, um, fighter turned out. So a lot of times the fighter has the selling point of, "Oh, you can equip any weapon." But most people are gonna pick one way they equip their character and stick to it Yeah And I, I built [00:45:00] the fighter based on Firion's appearance in the Dissidia games, he's carrying around 10 different types of weapons That's awesome using all, and using all of them in his combos. So like, all right, the fight- the fighter is the walking arsenal. The weapon master is the opposite end. Um- Ah There was also the f- there's also, um, I think there's, there's some jobs that I think got slept on, that get slept on by people. Um, one of them that especially comes to mind is the Spiritmaster. Um, Spiritmaster is a def- is a defensive favoring support, um, But their Spiritism ability is, for those, those of, those who have used it properly, um, have caused a lot of salt because it doesn't remove debuffs, it moves them. It moves buffs as well from any Nice to another participant[00:46:00] That's awesome So it's a really great way to screw over the, B-beg that just put a bunch of buffs on th- that just put a few buffs on themselves. You know, you can have the B-beg go, "I'm, I'm conflicting, I'm inflicting paralyze on one of your a- on one of your allies," and somebody who's got Spirit Master can say, no you don't, and congratulations, now you're paralyzed." Sure. Yeah, it's really incredible Mm-hmm. Uh, and the l- something I tried to av- I tried to avoid was giving h- was giving whole new s- there's plenty of, there's plenty of, um, charac- there's plenty of characters and builds that have some sort of sub mechanic, like some sort of resource or the like, which Mmhmm reason I avoided doing the whole limit gauge thing because that'd be one more thing to track. Uh, but I wanted [00:47:00] to avo- I wanted to avoid, um, a setup that might pigeonhole a particular build or a particular, um, job. Um, like for, for example, somebody wants to just slightly dip into magic, you have multiple ways to do it. You could do it through a spell casting enhantment- enhancement from a magic weapon. could do it by get- by getting scrolls and be- because of the way consumables work, you are gonna be able to use that spell for the rest of the in- for the rest of the in- of, um, that adventure until you hit downtime again. But you do have access to it. just... And that can pair very well with something like ma- with something like Magic Knight, which has more in common with the Magus class in Pathfinder than a lot Hmm the traditional ma- a lot of the traditional Magic Knight approaches. Uh, and [00:48:00] it wasn't long before, it wasn't long before that came up that the idea of a caster build out of Outlaw Star came to be. Um, there's... I've s- I have seen pe- I've seen people, um- Go com- go completely s- go completely support based using c- using a combination of general and, um, and squire. So that they, Yeah able to do a lot of attacks, but if they're patient, they're let, they're gonna let their, um, party do a lot of attacks, especially with things like blade work. Um really liked the looks of Squire. I was surprised at how much I enjoyed it, in fact. Squire was a hard one to write for because I bet it was couldn't use a lot of the t- I couldn't use the techniques as is for Squire in tactics because it's meant to be your starter. Um, and instead I built it around the idea that it is this, this ultimate [00:49:00] pocket pick. And think... I will note that th- that, um, a lot of the design with the classes and jobs starts to click if you look at them like you would look at positions on a team sport Yeah, I agree with that Because any team sport, whether it be hockey, whether it be, whether it be rugby, whether it be football or other football, you don't really have a jack-of-all-trades position You have several multi-role positions and usually a, a secondary role as a backup for when the play breaks down, and it will. But you don't have somebody who's supposed to be good at everything Oh. And that was, that was how, that was that was a design, uh, goal that I, that I had. Um, I think you hit that. and- Yeah, it, it's fun too. I'll just interject really quick because I think a lot of modern game design is [00:50:00] about being able to do everything, and every class starts to feel the exact same. Mm-hmm. Um, I've even, you know, played a lot of different games out there that are classless and messed around with them myself with my own design in the past, and I find that people tend to gravitate towards the same things. They're like, "I wanna be able to fly and have invisibility and invincibility." And I actually like it a lot more when you're like, "Look, this is what I do, and then everything else I suck at," because it gives specific spotlights for everybody in the party to be able to jump in and do their thing. You're not always good, and that's part of, I think, the fun Mm-hmm. Ah. And for, for me, I wa- I always saw the high skill floor when it came to people really being able to explore the [00:51:00] potential customizations with s- with job design, and also Yeah of that, that sameyness in some of the more freeform ones. And Yeah. Yeah. games, pe- the selling point that people give me is, "Oh, you can build just about anything." The problem is a Not really. And Yeah. one th- And, And, meta builds. to mind yeah. to go for it especially with, um, false choice as I call it, is Shadowrun agree with it. Yeah, yeah, the idea of false choice is a big one, and I think people who aren't game designers often overlook that. But there's a lot of things out there, it's like, "Oh, you have 1,000 choices," but really it's like, yeah, but do you... Like, do you really? No. It's usually only a few things that are, like, the best. And oftentimes too, if you take something, it's either actively bad or it's so much worse than something else that you actually can't choose it, so it's, it's not a real choice [00:52:00] And I think of, um, I think of Sha- I think of Shadowrun where it ends up having a class system while trying to pretend it doesn't Sure. Sure, sure. Oh. Yeah. Yeah, so I un- I understand exactly what you're saying. Mm-hmm. And on, on the other Yeah um, you know, some g- some designers try to build these traps for some reason. Um Yeah To tr- to try and encourage system mastery. But the pro- I've always ha- I've always had an issue when games have the, try to have this hard divide between the people just learning the system and the people who've been at it for years, with not an Yeah pathway from one to the other I agree And whenever I've talked about that, s- some have con- have equate- have equated that to wanting ha- wanting the handheld, [00:53:00] and that's not the case. it's more, it's more about establishing where, where the li- where the lines are. Um, Mm-hmm. and I feel like what I've tried to do with Legend Edition is those lines end up being created organically because instead, instead of looking at character creation of, in the sense of, "Oh, we, we need a bl- we need a black mage for the party, so who's g- who's gonna be that?" It's more about I have a character concept in mind, and I'm using the tool set to try and get as close to that concept as I can It's awesome Uh, and there's nothing wrong with the idea of, oh, you're building a c- you're building a character class first and then going around it. That's how early D&D works, in a sense. Sure it's not something I think is compatible with f- with, um, Final Fantasy as s- as the series progressed[00:54:00] Yeah Because there are plenty of characters, even in games that are explicitly class-leaning, like say, IX, where they end up fit- they end up fitting the niche of multiple jobs instead of just one. Uh, at, say, um, Amarant in Final Fantasy IX I was thinking of him as well He's basically a hybrid between monk and ninja. Or in Final Fantasy X, look at the territory of, um, say Tidus on the, um, lic- on, not on the license grid, in the, um, sphere grid. Mmhmm a lot of it leans into time mage and squire-like effects. Uh And you have that, you have that sort of asterisk where in a lot of class-based games you're picking this one thing and that's it. But a lot of Final Fantasy characters, [00:55:00] you can't really fit them into that one thing And that's not even getting into the idea that some people might wanna go off the beaten path Right? For sure So with wrapping up, I have a couple more things to cover. Um, one class, for example, that I really wanna play some point coming up for a very specific reason is the Oracle, and that reason is because I can self and-- self-damage myself to get myself to a limit break faster. Are there other classes that, that use self-damage for a bonus of some kind so that, you know, somebody wants to, like, limit break as often as possible? So Lim- because limit break is a bu- is a buff, um, and the f- and the fact that between, that you do full heal between encounters, um, trying to, trying to race to limit [00:56:00] break all the time isn't as beneficial as it may sound. Um, I just wanted to try it at least one time And any sort of... There are some ef- there are some effects that, aside from Oracle, that let you do that kind of, um, that kind of risk thing. Um, obviously one of the big examples is gonna be Dark Knight, who Okay when they're using Soul Eater, they can add a die of any size, aside from D20, their d- to their damage. However, whatever that additional die rolled, they ta- they take in direct HP reduction Yeah, I love it Oh In the s- in the same... There's a similar thing that works for, um, paladin when it comes to cover. Or not when it Right when it comes to paladin's oath. They can add that Oh, okay to their defenses, but the next t- but the next time they're targeted with an attack and that [00:57:00] attack is a miss, whatever that bonus they got from that die was, they take in, um, reduction Which I felt the theme of sacrifice that's a, that is key to the paladin identity I think so too. I also like that it's a foil, in a sense, for Dark Knight. There's a lot of threads in these classes that are really fun to pull at when you start getting into it. I can tell a lot of heart and passion has gone into making this. Mm-hmm. So I guess the next question with that, this is probably my last question, or it's like a little series of questions. But have you thought... Because Final Fantasy, like when we played, the story was great, and the adventure was super fun, and everything that you made I really loved. Also, though, Final Fantasy is like often thought of as a very combat-heavy series. Have you thought about [00:58:00] doing some kind of like PVP tournament where it's just like build your biggest, baddest team and fight against people online? And, you know, you've, you have, you have like a tournament series that's, you know, like you schedule once a week to you and your party fight somebody else. Or having that kind of thing, but then like for bosses, where it's like you and your friends build a team, you know, once a week you fight against some mega boss. You're not really intended to win, but, you know, it can be like a little bit of a competition thing for the community sort of thing. Just curious if you thought about these kind of things. I have given them some thought, and the idea of, of, um, PVP I, I would not advise because it really is built with the idea of the party has its own particular set of mechanics and the NPCs and their, Got it have their own particular set of mechanics opposite them. It's... I've, I [00:59:00] remember, I remember going through a bunch of, a bunch of games in the mid-2000s that ha- that did the whole PCs and NPCs are built the same way, and I, I don't wanna do that, um, Sure, sure becau- because it... I feel like it would fall back into that same n- into that sameness that we talked about earlier. Mm-hmm. Mmhmm on the other hand, the i- the idea of competitively going up, going up against a certain boss, um, that I'd be a, that'd be a little bit more willing to go with. Um, it would certainly, it would certainly fit alongside some of the um, style video games that we, that we've seen over the last few years, stuff like, um, stuff like Dead by Daylight or the Friday the 13th game, for example. Or even the battle mode, uh, multiplayer entry that was in Doom Eternal. [01:00:00] Uh This i- this idea of asynchronous play. And the approach that I'd probably do is not a, "Oh, this is a, this is a, um, this is a near impossible bo- because I don't wanna revisit the trauma that people have had to deal with with certain hidden bosses in RPGs, Sure. every Tri-Ace game I've ever played. Or the, um... Are you familiar with, are you familiar with the infamy that was Absolute Virtue in Final Fantasy XI? No. No, I'm not familiar on record as one of the mo- as one of the hardest raid bosses of all time. Uh, like, it, it's just a long, long slog. Got it. I mean, that's no fun either. Yeah of course when people figured out how to beat, how to do exploits to beat it, they're like, "All right, we're gonna make him even harder." Got it. I have a special level of [01:01:00] hatred towards, Ozma as a hidden boss, mostly because he cheats. that's not Yep that's not me exaggerating. There's parts in his AI where you can completely jump his, um, ATB gauge depending I see. which is Yeah, I'm not surprised. why I Yeah the same way AI in, um, some RTS campaigns cheat Sure In, mostly in the they have unlimited resources and you don't kind of way Yeah, that's a pretty big cheat Oh. But what I'd prob- what I'd probably end up d- what I'd probably end up doing is some sort of, some sort of raid boss like enc- like encounter where beat, where, um, it's not just be- it's not just about beating the opponent, but also beating the opponent, surviving, and d- doing certain additional challenges Yeah[01:02:00] There's, I like there lot. Um, Yeah obvious- so think, think less of a raid boss in WoW and think more of, um, say a mission in Monster Hunter Yep, I'm tracking Oh. And 'cause I f- 'cause I f- I feel like doing a, doing a PVP thing is something that doesn't... It, it's certainly there in PVP. It has been in FF XI and XIV. But I feel like getting the coliseum part of the identity, you know, the coliseum mini-game that's been in multiple games, uh, the way to go about that would be to would be, would be to do something beyond just PVP, whether it be escalating monster types or, um, something that I just came up on the fly, a wager [01:03:00] system like you see in some ARPGs, where you can intentionally nerf yourself to potentially get better loot Yeah, yeah. It just comes to mind, I, and I think maybe you're totally right about this too, I mean, PVP can kinda be a feel bad thing sometimes as well. Mm-hmm. Whereas if you are even loosely competing against somebody, or maybe not even competing, but just, you know, competing against yourself to try and do X, Y, Z thing, fighting, like, a boss. I personally like competition a little bit, so maybe that could be fun. But, um, yeah, I hope you try something like that, 'cause I would, I would be in for it. I could get, I could get three other guys together, to be and we would, you yeah. see me build a s- build a separate, um, say c- say card game or s- or skirmish war Sure lean in- to lean into that instead Sure, sure Um, 'cause I feel like that would be- that would better f- fit that since [01:04:00] obviously I, even in those ca- even in, um, something like that, I still don't wanna have to deal with meta. I, Sure if you, I want, I would want to, um, I would wanna have it le- less akin to the flag or team deathmatch, and more akin to, like, big team battle in H- in Halo, for example. Sure a way, a way to experiment with the sa- with the sandb- with given sandbox, but not necessarily building it arou- around one, around one particular meta. Yeah. as I get it as- a bit of an aside, there wa- there was a incident at a, um, Yu-Gi-Oh tournament years ago where somebody in with a random ass deck and completely embarrassed everybody, and it was his first tournament. Because Oh, that's awesome. for, they were all planning for this very, very specific meta at that [01:05:00] tournament, and he wasn't playing that, so they ha- so they were basically coming in completely blind and had , and had no I love that no strategy at first to prepare for, and only got one as they adapted ov- over the, over subsequent rounds. Mm-hmm Um, it's ... Imagine, imagine a football coach spending hours watching film, only to realize he's watching film for the wrong team he's playing against Yeah, totally Oh. And I've I think that kind of thing's hilarious. I love that. yeah, I've always appreciated, um, I've always appreciated people pulling dumb stuff in games I agree. Yeah, I think it's part of the creativity and the fun and that, that's what we're talking about, right? Like, that's-- it's a role-playing game, so you can role play a character you want, not to optimize. But, Yeah um, yeah, I th- I guess we should probably wrap up here, Mm-hmm.[01:06:00] but I feel like we'll have more conversations coming up in the future. Is there anything else you want to wrap up with? Um, Or final things you wanna say, I, I should say? I will note that while it is gonna be a slow process, I am in the early stages of writing world books for Legend Edition. Cool. Um, Good to know been working on a, in a, um, not necessarily a default campaign setting, but a potential campaign setting, um, that I've codenamed Project Gaia. Um, which is do- is doing th- is doing a bit of, um, of steam pu- of steampunk with magic. It was my answer to the question of the magic versus technology motif that's often in steampunk and other speculative fiction. The answer I give is and technology are two sides of the same whole and feed into each other So, Well, that's great. mm-hmm Yeah, I'm [01:07:00] looking forward to that Oh yeah And, Well, thank you so much for coming on today then, Mildreth. It's always a pleasure. Oh, yeah I hope everybody, if you haven't tried out Legends Edition yet, you really need to. Um, I'll make sure to include a link. It is a free download for anybody who's been listening in and, you know, doesn't know anything about the project yet. Uh, it's a great game. I think you should take a look, find what class and jobs you wanna try, and, uh, yeah, let us know what you're having the most fun with with your group Mm-hmm. Oh otherwise, we will catch everybody later then Stay frosty Mm-hmm. Yeah, it's funny you said w- um, 45 minutes. We ended up going an hour and seven. Uh